Sunday, August 31, 2014

they're getting the toys working

  
LCD screen works

Success with if/else statements.  A good way of getting kids an understanding of structures are for them to tweak them or drop them into another sketch altogether.  Figuring out the code gets dropped in (initialization, void setup, void loop) is part of it.  
I want the kids to get outside some this week and play with the xbees and sensors (they deserve it), but I also want them to get to where they instinctively know where to add the tweaks in simple stuff.  I think I"m going to try a day where they figure out what to insert into an existing sketch and where to insert it.  Scratch is a good program that allows beginners to click and drag code lines, and if we had more time together, I would have started my kids with it.  I highly recommend it for teachers who have a good bit of time to play.  

In an ideal schedule, I would also have:

  • Troubleshoot day.  Have a sketch shown with various mistakes.  When the sketch won't upload, kids brainstorm how to fix the mistake and use the error bar at the bottom of the screen to help them troubleshoot.  Kids could even write down their own list of common error messages and "dejargon" them.
  • Sketch mashup.  Goes a bit beyond the tweak.  Take two seemingly unrelated sketches and mash them together.
  • Sketch repurpose.  Take a mundane demo sketch and repurpose it to something useful at home. 

Thursday, August 28, 2014

Tuesday, August 26, 2014

if/then

Kids have been tinkering with if/then statements for a couple of sessions.  First, the load a bare-bones sketch with a serial read where a potentiometer shuts on or off an output at a set threshold point.  In this case, I had them use a hobby motor.  Then, I told them to tweak the sketch by pulling out the motor and adding 20 LED's and let the threshold alternate which LED is on.  From there, I had them apply similar logic to getting a temperature sensor control output. 

I plan to do the same approach of apply structure, tweak, and tweak again to learning FOR statements.  After that, let them build whatever with the structures they've learned.  I

From there, it's time for phase 2:  assign roles/teamsfor our WEW project and get them going. 

Monday, August 25, 2014

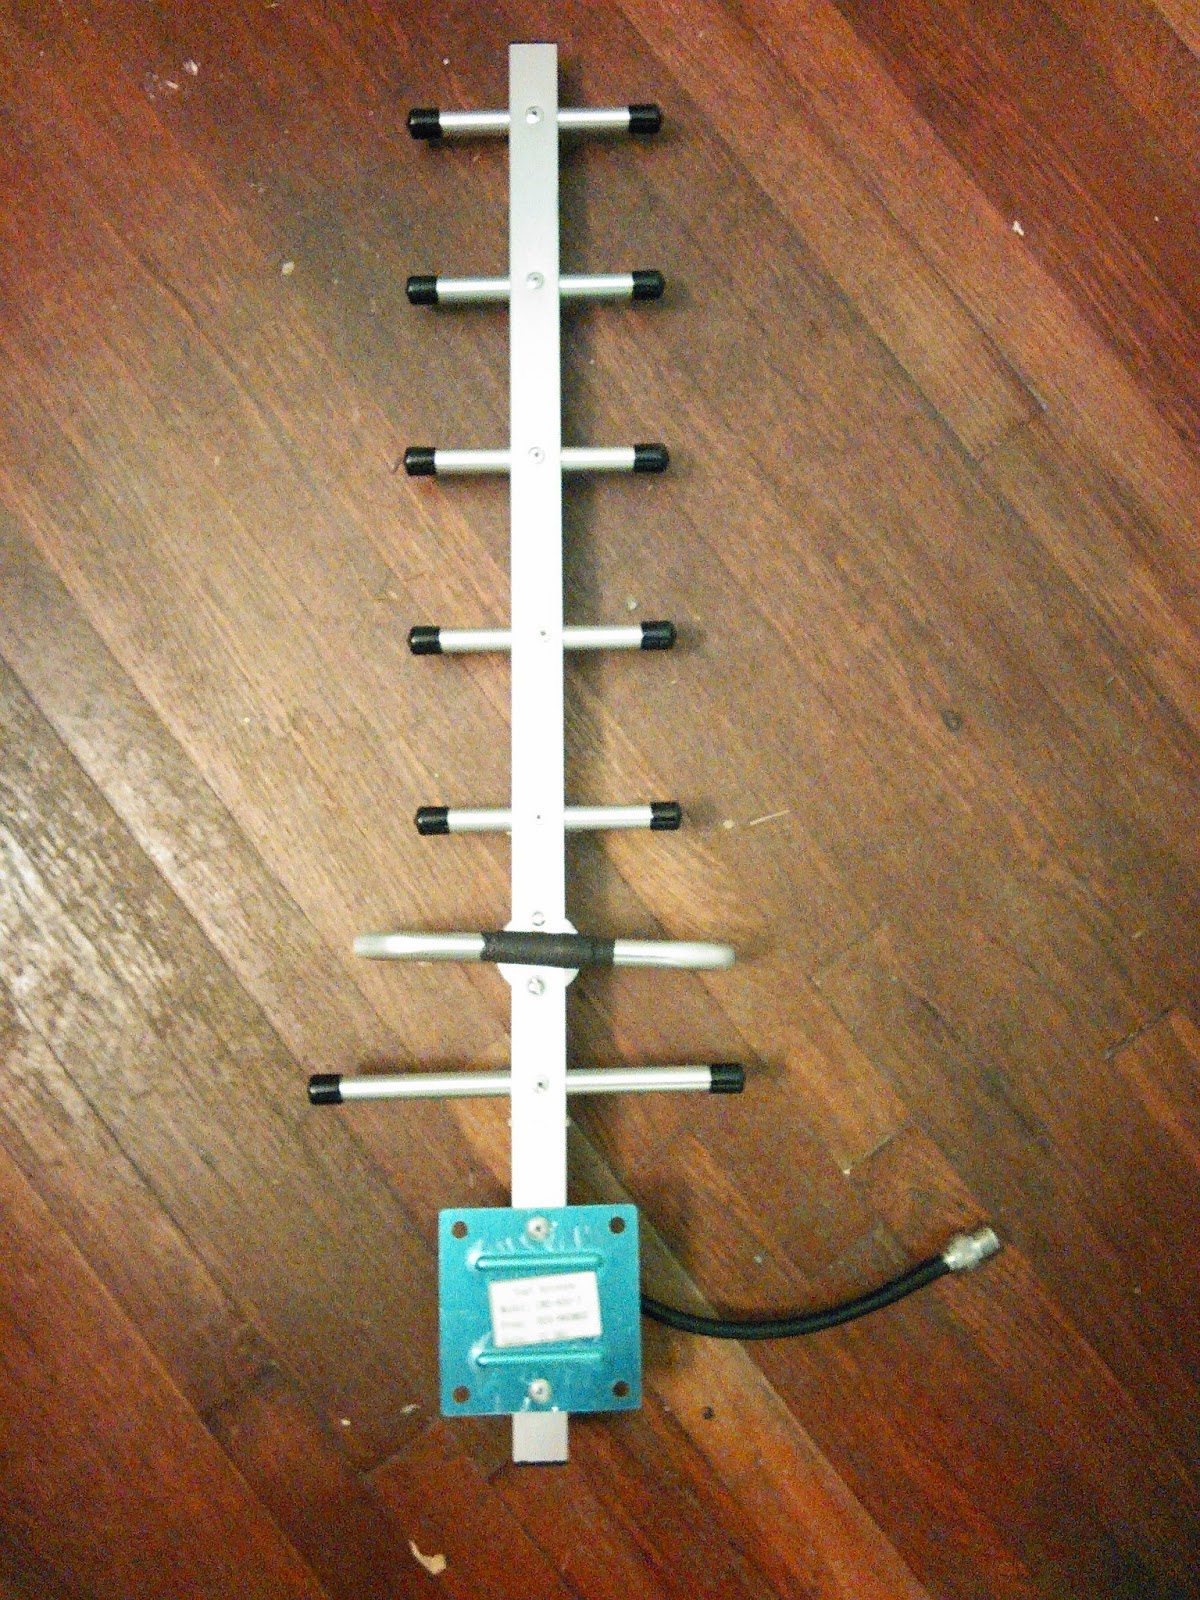
Yagi

Taking up a suggestion we got and will see if a couple of these Yagi antennas will provide any boost on our wireless end.

Sunday, August 24, 2014

Week 2 recap

We've just gotten through analog to digital and if/else statements.   Mrs. Johnston reports that her kids are excited and thoroughly enjoying themselves.    I'm hoping that we can get outside some this week and play around with the wireless some. 

On Friday I gave kids a challenge to figure out how to use if/else to make a light come on or off based on a potentiometer value.  Several kids got it, and so did our intrepid librarian, Mrs. Wells.

On introducing FOR loops, the best approach is to probably show how kids who have stacked lots of LED's in sequence can make their code a lot shorter and simpler with arrays.  

The catch for us right now is time- how to make 35 minute sessions really work.  

Some changes: 
  • For sketches that are meant to demonstrate a concept, have a copy printed out or uploaded onto something like Google Drive.  Let them load up and then explain to them what is controlling what.  Then they can start tweaking away on the sketch by changing code and hardware. 
  • Also during these purely instructional sessions, let them pair up on a screen and a kit.  That means less troubleshooting of board pinouts, sketches that won't load, unrecognized ports, which means less wasted time. 
  • I'm letting students checkout a simplified kit with an Uno, small breadboard, and a few jumpers, leds, buttons, resistors.Not quite ready to let them check out the SIK kits yet.  

Sunday, August 17, 2014

site 1 layout

Here's an overhead of North Chick flowing to the west of Hixson High and Hixson Middle.  The nearest point that wireless can get to an ethernet connection is the middle school-about 950 feet or so.  Ms. Johnston's kids will be seeing what a pair of Xbee pro 900's can do.  There will probably have to be at least a third one in the signal chain.  A couple of kids want to try their hand at Yagi antenna building....


Tuesday, August 12, 2014

Got it started

Just met my group for the first time.  Most of the kids I've had before.  Our Librarian Mrs. Wells had everything laid out (laptops, Sparkfun Inventor's Kits, a projector and screen).  I ran through my intro presentation.  Here's the powerpoint I showed them that outlines the project and the rest of the semester. We got the kits assembled.  Tomorrow will be all about blinking lights, digitalOut, and timing.

Sunday, August 10, 2014

getting visual

Some things just need a picture.  This weekend I'm figuring out how to best explain stuff like analog, digital, input, output, etc.  Throwing up on LoggerPro the ebb and flow of the HIGH's and LOW's (set at a very slow, viewable rate) seems like a good idea.
                                                 

Friday, August 8, 2014

our first stream/ what a good day of professional development looks like

Professional Development before school starts is usually a short saison en enfer, but not this year.  Our team got to wander around a creek, play with wireless communication, and actually come up with useful, concrete ideas that didn't go in a 3 ring binder.


Right behind Hixson High is North Chickamauga Creek.  Here is the sampling spot.  At the this point in the stream, the flow is through  Devonian limestone.  The greenish tint of the water along with lots of cedar and walnut trees nearby are good indicators of the "sweet" soil.  However, on Walden's Ridge, where NCC begins, we'll be dealing with very acidic water from coal mining damage, pyritic rock and shales that provide little buffering capacity.

This will be where we do our design tests for the buoy design and wireless capability.  Lots of things for the kids at Hixson to iron out.


After doing the field work, everyone went to the library where we discussed how to work out the live tutorial streams between schools.  Andrew, a young engineer I've been bouncing ideas with, happened to be there.  We commandeered him to join our meeting, and he gave us some good ideas on getting our data up to the Cloud.
Displaying 20140805_142317.jpg

Recruitment

Showing a bit of the project in action helps round up interest.  Just got through showing a pair of xbee's to some kids in homeroom.  I let one of them walk out the halls with an xbee attached to a laptop via a Sparkfun dongle.  She enjoyed typing creative insults at a distance, though with a physics or math bent:  "Your field lines are sooooo weak."

Sunday, August 3, 2014

Opportunities for Depth

Time's going to be tight.  My time with the youngsters is going to be 35 minutes three days a week.  There's no grade, no credits, no tests.  Just do it.  Not a lot of room for fat.
That said, I'm thinking of a few spots where we can get into some depth


Analog to digital. Nature is analog, our rendering of it digital.  We start hammering this pretty early, sticking potentiometers, thermistors, photoresisters, and the like for a variable signal into the Analog In ports of the Arduino to get a serial read.  Taking whatever phenomena/event from the outside world that you're focusing on and getting a measurable output for data or to control commands is a whole lot of, well, everything in the electronic and scientific world.  This has gotten me thinking about using the venerable      555 timer IC, the original "hobby board", and the most used integrated circuit in history.  8 pins, simple setup, less than a buck apiece, and like Arduino has been spun into countless projects.  

Run in "astable" mode, it's programmable by setting values the two resistors and a capacitor.  

The resistors and cap chaining to ground makes, of course an RC setting, setting the pulse of the output to whatever frequency.  If all values are fixed, then the pulse is fixed, and that pulse can be sound, light, or whatever.  But set a variable resistance between pin 7 and vcc and the output will vary accordingly.  And that resistance can be a function of whatever you are measuring.  
Lots of concepts packed into half a dozen components, easy to build, and with plenty of room for exploration.   It is a good building block for learning microcontrollers and gets you down to more fundamental concepts that otherwise get hidden in the do-all quality of Arduino.  

Counting and Calibrating.    Whether we're testing water or air quality, we're turning environmental behavior into a voltage, and either counting those voltages as pulses, or turning them into a value (conductivity, pH, ppm).  I might dig up an old circuit that like the 555 timer, is 1970's level technology, complete with a couple of obsolete chips. 
There's a couple of science teacher's supply outlets that still offer a version of this: the anaerobic respiration bubble counter.  The yeast respirates carbon dioxide as it ferments.  Experiment with temperature, sugar type, etc. and compare data sets.  
The setup is a photogate that goes high when a bubble passes by.  Old 4026 CMOS drivers advance the count of the 7 segment number displays.  I could demo it as is, then unplug the sensor and put it to the Arduino, moving from old school to new school.  Maybe we could add a gas pressure sensor in the mix and see if the kids could mentally dust off their gas laws from chemistry class and estimate an average volume or particles per bubble, adding dimension to a dimensionless value.  We'll see on that one. 

Saturday, August 2, 2014

Fritzing

We'll be using the  popular free circuit building program Fritzing for a lot of our tutorials.  A lot of online electronics/microcontroller tutorials use it. That way I can build a circuit on screen as I talk.  I'm going to encourage the kids to load it on their devices and use it themselves in and out of class.  It will be very helpful if a team needs to bounce ideas back and forth. The great thing is that beyond the wires, capacitors, and well known IC's, they have icons for different microcontrollers.  Here's an example:

Find People Smarter Than You

Been up at the school today trying to plan and get the room ready for the the youngsters.  At noon, I shot over to the Chattanooga Public Library's 4th Floor to check out the Maker Party.  I enjoyed sitting down and learning a few things about TinkerCAD, which is used to design stuff for 3-D printers.  I think it might be a good program for the kids in my Energy Systems class to do some project designs, particularly some that will have some overlap with our Wireless Earth Watchdogs.

I had a pocket flip pad and pen to kiss butt and take names, particularly those who might be interested in dropping by the WEW and helping the kids with a particular skill.  I had some skills in mind, and found a couple of prospects.

It's good to Find People Smarter Than You and get them to lend a helping hand.  For example, We're thinking about using an Ethernet Shield to get some of our data online in real time.
Arduino Ethernet

I looked at some of the code for a sample chat program:

Chat  Server
 
 A simple server that distributes any incoming messages to all
 connected clients.  To use telnet to  your device's IP address and type.
 You can see the client's input in the serial monitor as well.
 Using an Arduino Wiznet Ethernet shield. 
 
 Circuit:
 * Ethernet shield attached to pins 10, 11, 12, 13
 * Analog inputs attached to pins A0 through A5 (optional)
 
 created 18 Dec 2009
 by David A. Mellis
 modified 9 Apr 2012
 by Tom Igoe
 
 */


#include <SPI.h>
#include <Ethernet.h>

// Enter a MAC address and IP address for your controller below.
// The IP address will be dependent on your local network.
// gateway and subnet are optional:
byte mac[] = { 
  0xDE, 0xAD, 0xBE, 0xEF, 0xFE, 0xED };
IPAddress ip(192,168,1, 177);
IPAddress gateway(192,168,1, 1);
IPAddress subnet(255, 255, 0, 0);


Well, I don't know rip about the stuff with IP addresses.  I research further and find that the communication is often done by a Telnet, which is pretty much the Internet circa 1970.  This got me thinking that maybe this is an opportunity to get a little tech history in, and some deeper concepts about how the internet works at a core level, with the addresses asking for permission to send and receive and all that. Nothing big, just a brief "pop up" while we're going over this part of the project.  I pitched this mouthful to some folks and I got a contact for someone who might be good for this skill/concept.

Don't be afraid to network.